My daughter, the inspiration behind Celiac Mama, turned five years old this weekend. It’s a milestone to me for so many reasons. First, because my oldest child has graduated from pre-school and is moving up to kindergarten (cue the tears). But also because she has grown into such a happy, kind and healthy little girl. I’ve seen her blossom so much since we found out why she was feeling so sick almost three years ago. Managing celiac disease naturally has its challenges; but, now that we understand how to keep her healthy, she has been able to enjoy life more fully and it’s been an absolute joy to watch.
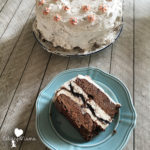
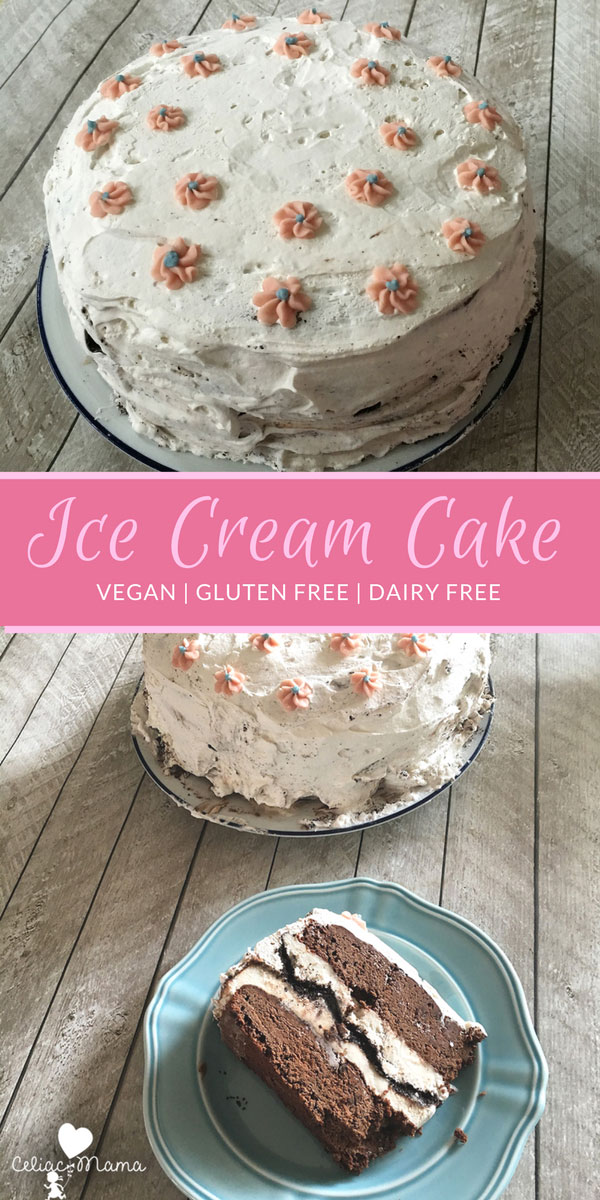
When I started thinking about her birthday party, I asked her what kind of birthday cake she wanted to eat. Now, I have to be honest and say that I expected her to say chocolate cake with vanilla frosting, but that’s not what she said. Her response was surprisingly specific: “Mommy, I’d like an ice cream and brownie cake with pink flowers on top.” She’s never had that before so it totally cracked me up. But, I wanted her to have whatever she wanted on this special day, so I was determined to figure out how to create an epic gluten free and dairy free ice cream cake.
When I started looking at the steps that went into traditional ice cream layer cake and all of the time that it was going to take I decided to rely on some of our favorite brands rather than add onto the time factor by making the ingredients from scratch. I’ll keep the ingredients list below more generic in the recipe so that you can sub in your preferred brands, but here are the brands that worked really well for us:
- Luna and Larry’s Coconut Bliss ice cream
- King Arthur’s gluten free brownie mix
- Wholesome organic vanilla frosting
- India Tree red and blue natural, plant based food coloring (made from concentrated vegetable colorants)
- So Delicious CocoWhip
- Glutino chocolate sandwich cookies
- Santa Cruz dairy free organic chocolate syrup
Cooking tools you’ll need:
The recipes I share on Celiac Mama are almost all quite simple to make in terms of ingredients and prep time on purpose. I’m a busy mom that wants my kids to eat well, and elaborate ingredient lists and preparations just don’t work for our everyday lifestyle. But, there are exceptions to every rule and birthdays definitely make the cut (pun intended)! To create this cake, you’ll need:
- Parchment paper
- 1 baking sheet
- 2 9-inch round pans (or you can use one and clean it in between, as long as you’re ok with added time)
- 1 9-inch spring form pan
- 1 large mixing bowl and 2 small salad bowls
- Wilton 2D and 1D icing decorating tips
- 2 ziploc bags or disposable decorating bags
Now you have the list of what you’ll need to make this incredible gluten free and dairy free ice cream cake, so let’s move on to the step by step instructions.
Gluten Free Dairy Free Ice Cream Cake
Ingredients
- 3 pints of gluten free and dairy free ice cream
- 2 boxes of gluten free brownie mix plus the added ingredients needed to make it i.e. eggs, oil, water
- 1/2 cup gluten free and dairy free chocolate fudge syrup
- 1 package of gluten free chocolate sandwich cookies
- Red and blue natural food coloring
- 6 oz of vanilla dairy free frosting
- 9 oz. coconut cream dairy free whipped cream
Instructions
-
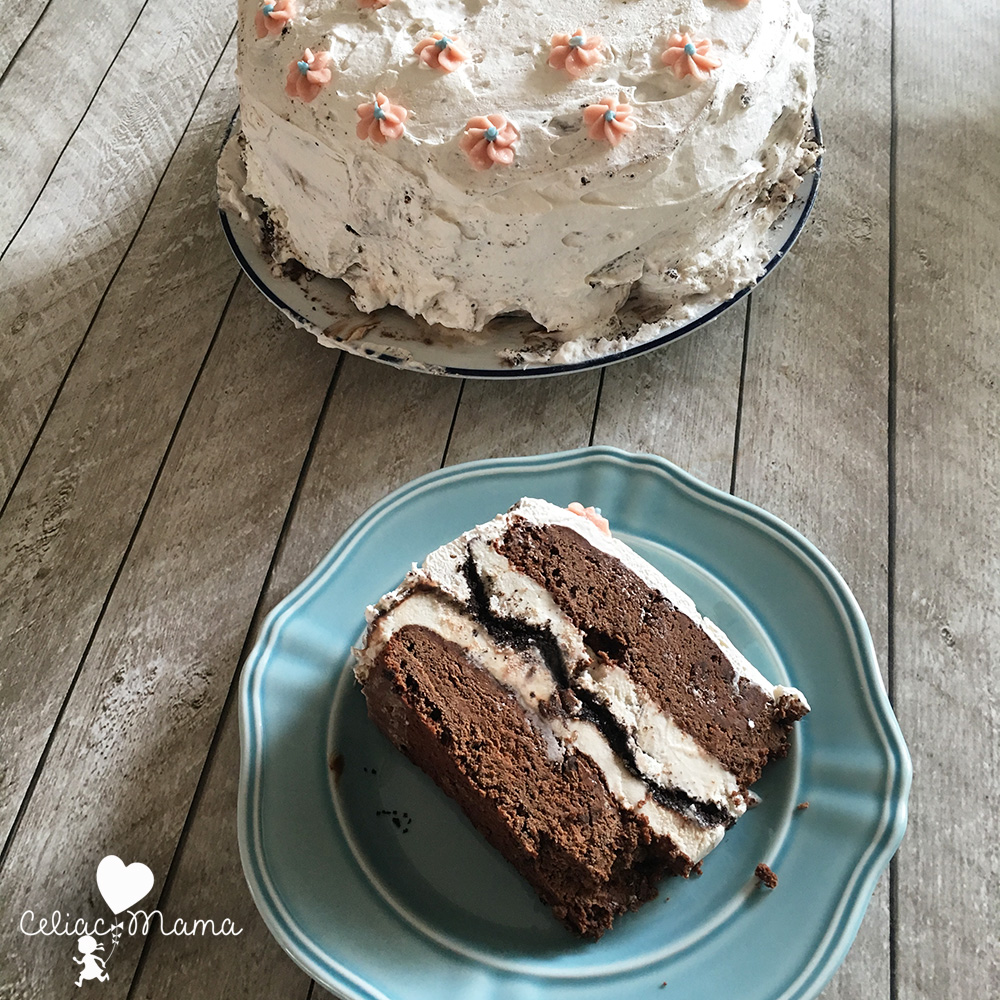
Make the brownies according to the package directions. If it asks if you'd like fudge or cake-like brownies, opt for fudge. This will keep it more moist after it's frozen later. If it calls for butter, substitute with dairy free butter or coconut oil.
-
Divide the batter evenly into two 9 inch round pans.
-
Bake until a toothpick comes out of the center almost clean, and remove from the oven.
-
Remove the brownies from the pan and let them cool completely.
-
Line the bottom of your spring pan with parchment paper.
-
Add the bottom brownie to the 9-inch spring pan. Place in the freezer for at least one hour. This will make spreading the ice cream easier.
-
While the bottom brownie layer is freezing, open the package of chocolate sandwich cookies. Scoop out the cream on the inside and set aside to be discarded.
-
Once finished separating the cookies from the cream, add the cookies to a blender and blend until course. You want it to be almost fully blended, but not smooth so you get the crunchy texture. Set aside.
-
After the bottom brownie layer has been freezing for at least an hour, place your ice cream on the counter for 15 minutes, until it's soft but not melted.
-
With a flat butter knife or an icing spatula, cover the bottom brownie with a layer of ice cream (1 1/2 pints).
-
Top the ice cream with a layer of chocolate syrup.
-
Cover the fudge with a layer of cookie crumbles.
-
Add the second layer of ice cream on top.
-
Add the second brownie and put it all back in the freezer for a minimum of 12 hours. I let it freeze overnight.
-
Meanwhile, you can make your swirl drop flowers.
-
Take out your baking sheet and line it with parchment paper.
-
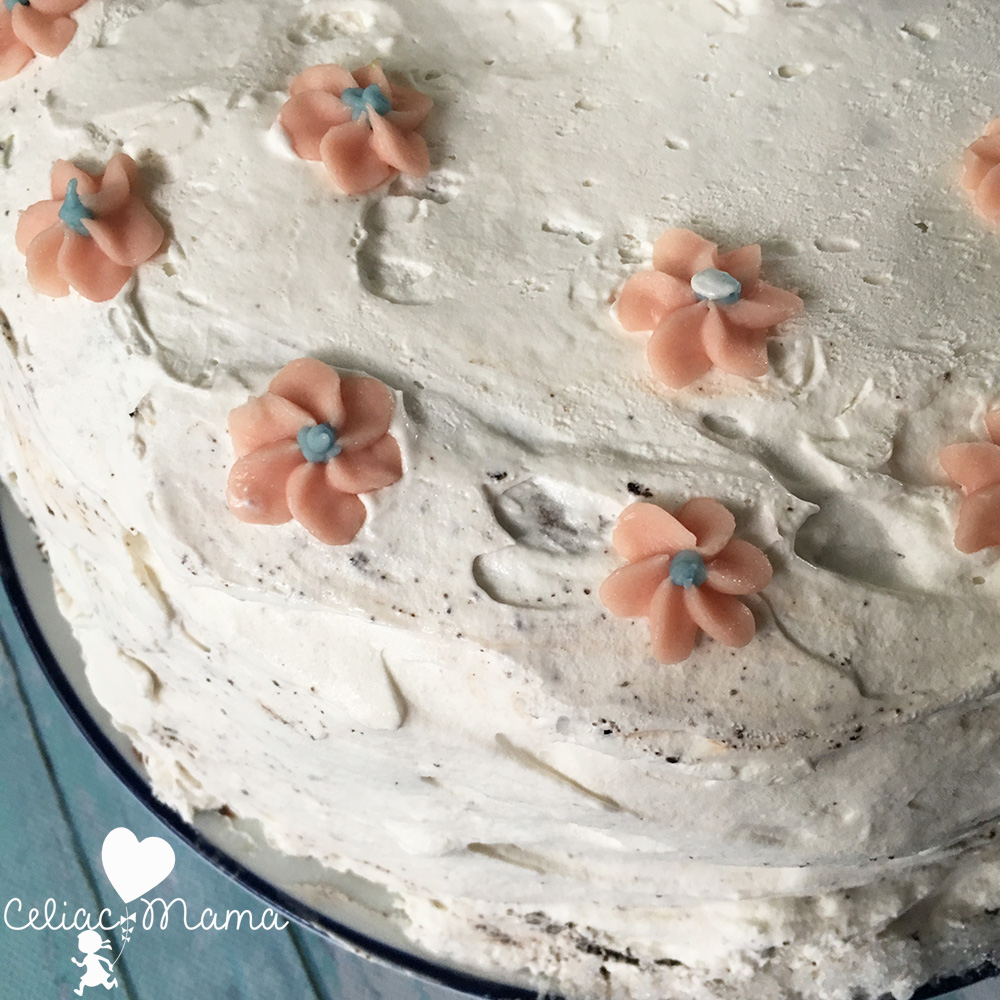
Divide 1/4 of the frosting into one bowl and add 2-3 drops of blue food coloring at a time until you get the desired blue hue.
-
Add the other 3/4 to a second bowl and add drops of red food coloring until you get the desired pink hue.
-
Get out two decorating bags (or ziploc bags) and cut off the edge of one of the corners.
-
Place the decorating tips inside the bags so that the pointed end sticks out of the corner opening.
-
Add both frostings to two separate decorating bags.
-
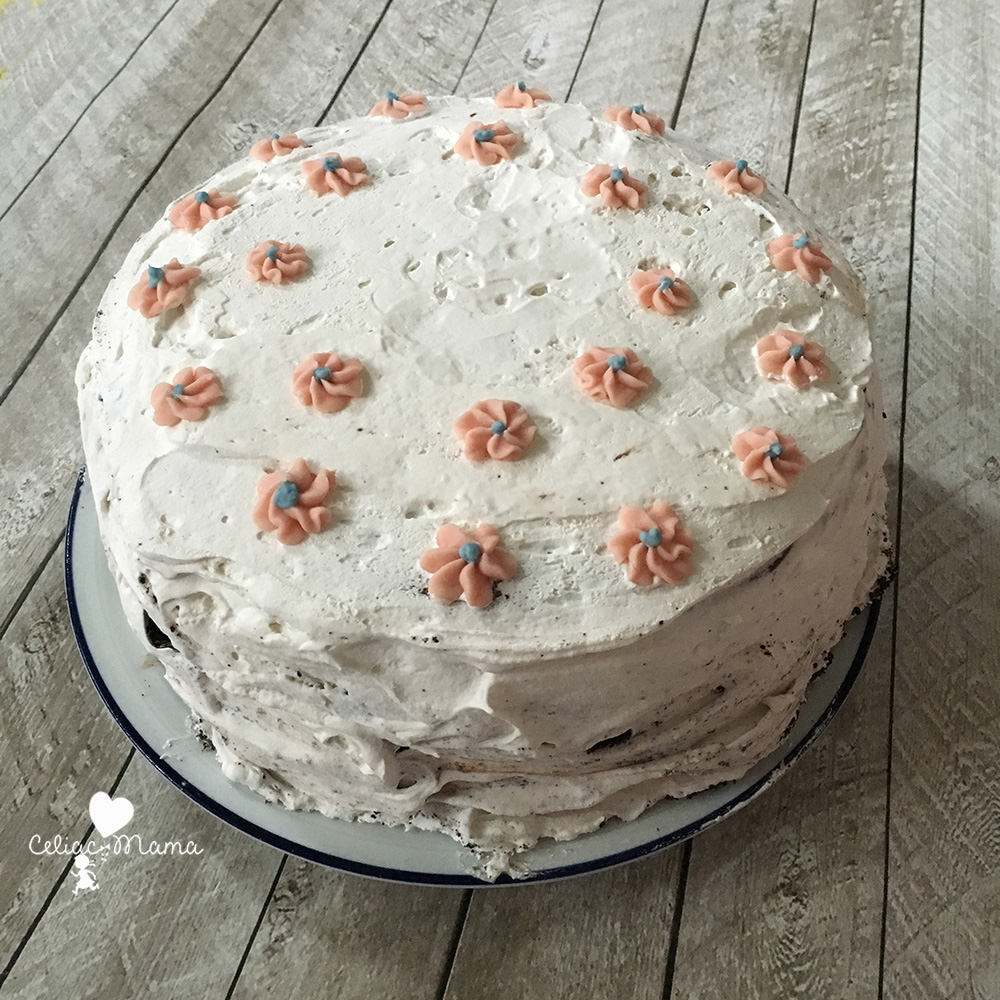
Holding the pink decorating bag, place your hand on the parchment paper lined baking sheet. Turn your wrist holding the decorating bag so that your knuckles are facing 9 o'clock (or 3 o'clock if you're left handed).
-
Press down on the parchment paper, and while squeezing the frosting out of the bag turn your hand clockwise until your knuckles are facing 12 o'clock. Lift and you'll have a nice flower shape.
-
Repeat the last step until you have the desired amount of flowers.
-
Add a dot of blue frosting with the other decorating bag to the center of each flower.
-
When finished making the flowers, put them in the freezer overnight or at least 10 hours.
-
Remove the cake from the freezer and carefully remove the sides of the pan.
-
Frost the top and sides of the cake with coconut whipped cream.
-
Place the cake back in the freezer for 2-3 hours.
-
Remove the pan of flowers and using a spatula carefully remove each one so that it's not stuck to the parchment (they should pop right up).
-
Remove the cake from the freezer and apply the flowers to the top of the cake with your hands wherever you'd like them. The coconut whipped cream will be solid but have some soft give to it, which will help the flowers stick to the cake.
-
Place back in the freezer for at least one hour or until you're ready to serve.
Recipe Notes
Serving note: I find that coconut ice cream melts more quickly than regular ice cream, so I wouldn't keep it out of the freezer for 30 minutes prior to serving like they tell you to with regular store bought ice cream cake. I would let it sit for five minutes, add your candles and sing happy birthday. By the time you've finished another 5 minutes have passed and that will be the right time to cut the cake.
Serving note:
I find that coconut ice cream melts more quickly than regular ice cream, so I wouldn’t keep it out of the freezer for 30 minutes prior to serving like they tell you to with regular store bought ice cream cake. I would let it sit for five minutes, add your candles and sing happy birthday. By the time you’ve finished another 5 minutes have passed and that will be the right time to cut the cake.


We are ice cream cake fans in this house and I love the brownie addition!
Thanks! The brownie add on was my daughter’s idea. It really added to the flavors and textures.